Ignitor: User Interface Overview
The figure below shows the UI view of Ignitor.
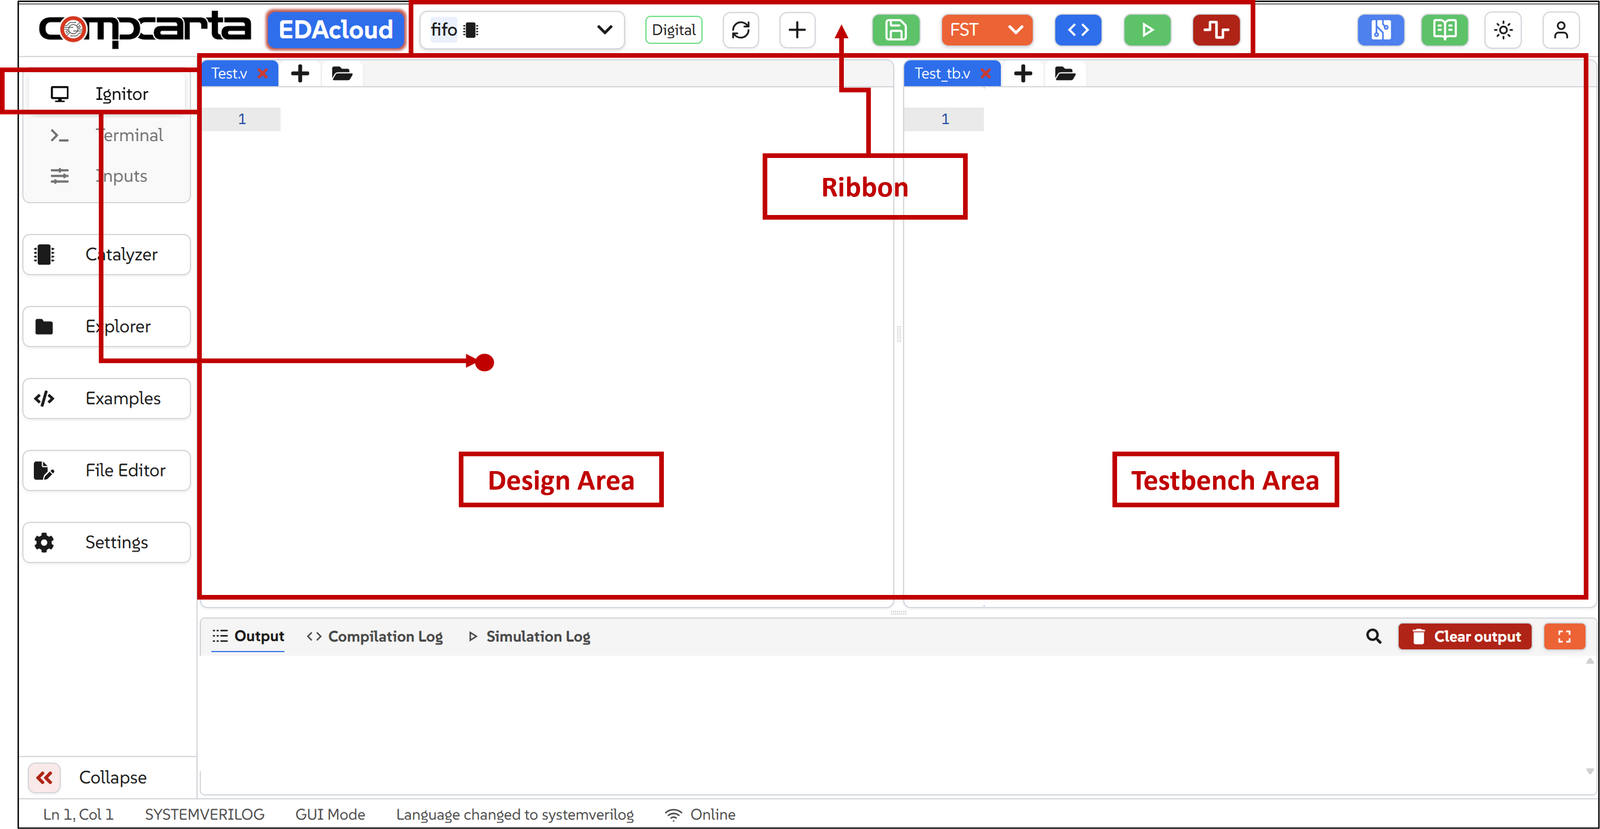
The Ignitor window has following components:
1. Ribbon
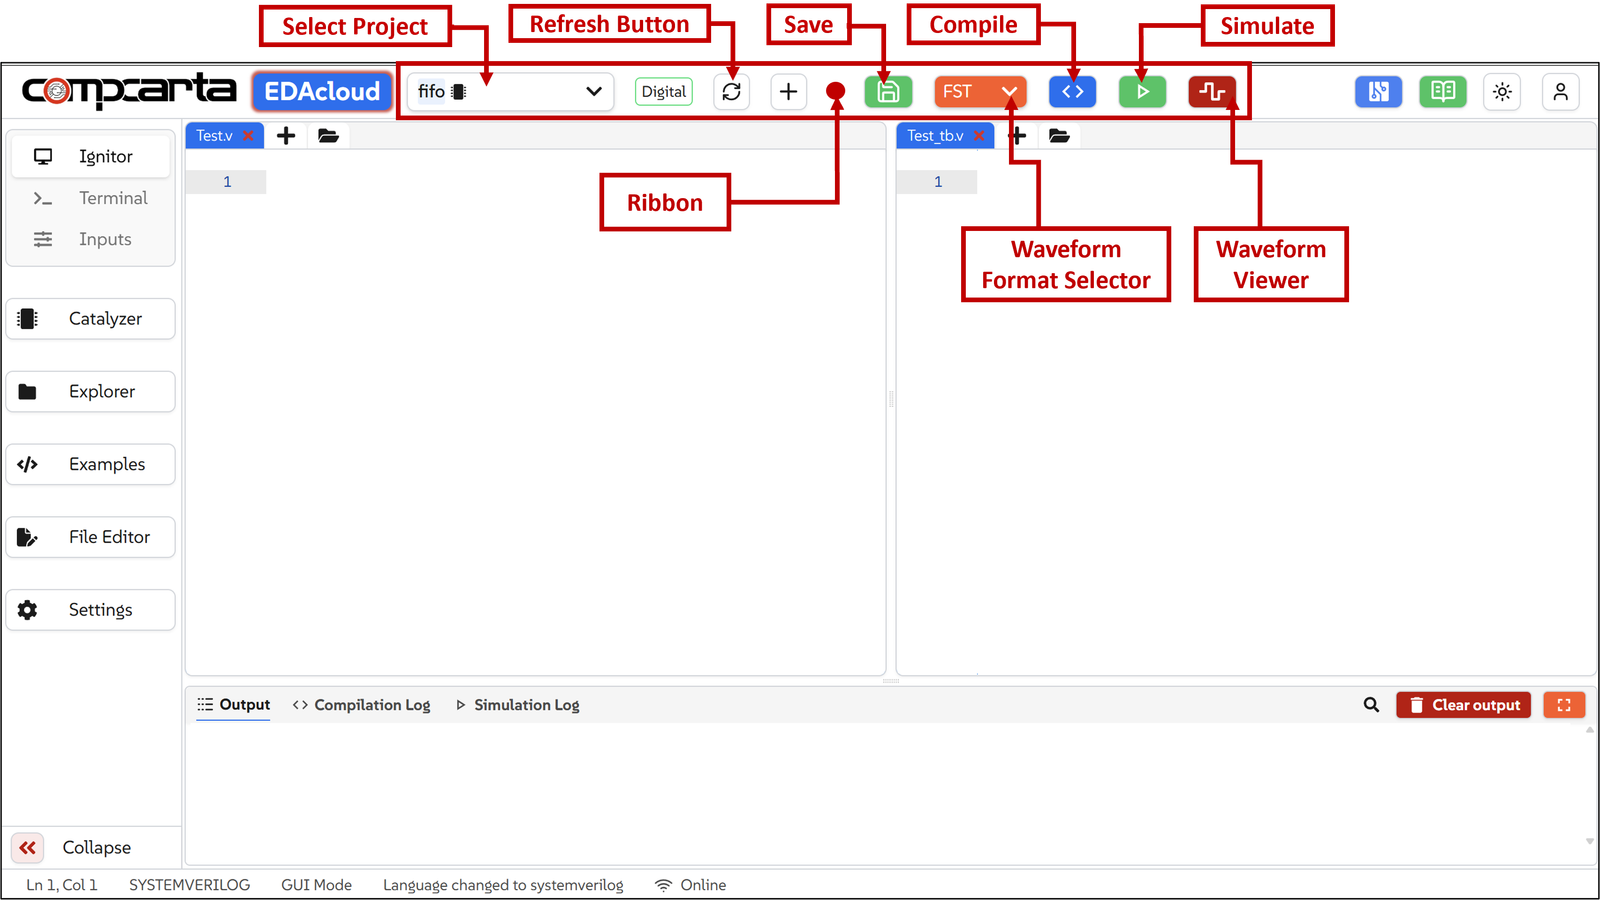
(a) Select Project
(b) Refresh Project List
(c) Add Project
(d) Save Project
(e) Waveform format Selector/Power Analysis Selector (Default FST)
(f) Save, Compile, Simulate and Analyze
2. Design Area
The Design Area within Ignitor is used to add and manage RTL design source files required for simulation and verification. It provides quick access to both creating new files and importing existing designs into the workspace.
The 'Open File' icon allows users to access the Design File Explorer, from where existing design files can be imported into the project. The “+” (plus) button on the ribbon is used to create a new file, enabling users to start writing RTL code directly within the editor.
3. Testbench Area
The Testbench Area within Ignitor is used to create and manage testbench files required for validating the RTL design. It provides a dedicated space for writing stimulus, defining test scenarios, and observing design behavior during simulation.
Similar to the Design Area, users can use the 'Open File' icon to import existing testbench files from the Testbench File Explorer, or the “+” (plus) button to create a new testbench file and begin creating one directly in the editor. This enables flexible testbench development and seamless integration with the simulation flow.